
Scandi Granny Pillow Pattern


This post contains affiliate links. Affiliate links cost you nothing, but when purchasing through these links you help me earn a small commission. This supports me and my family and my continued efforts to bring you free patterns.
Intro:
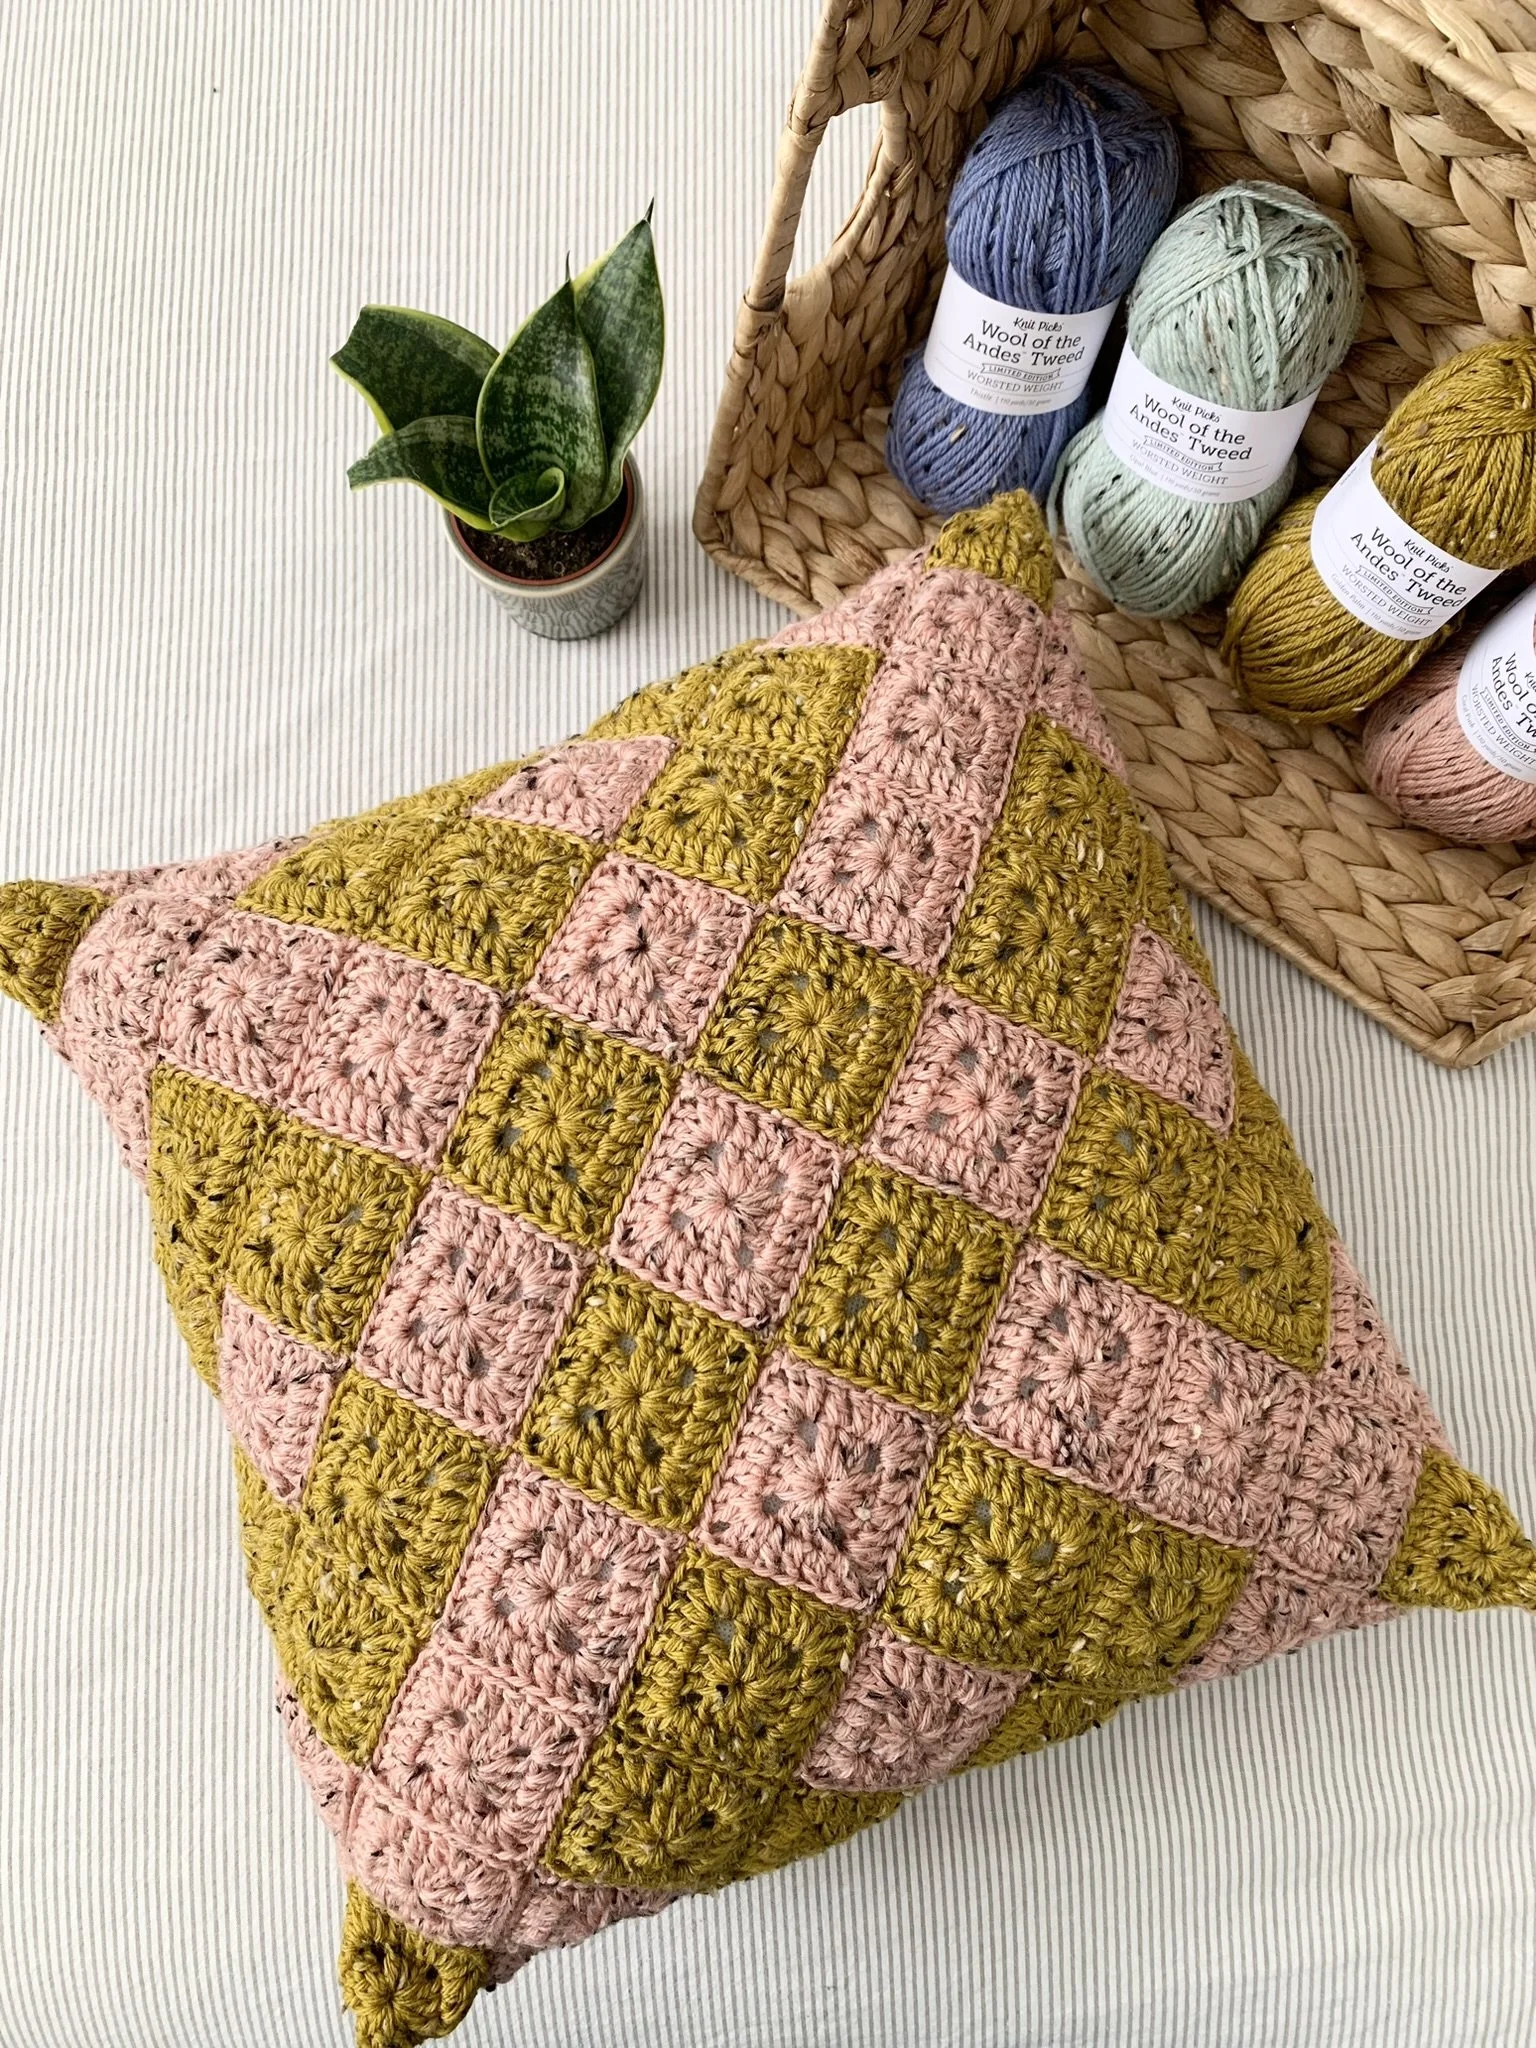
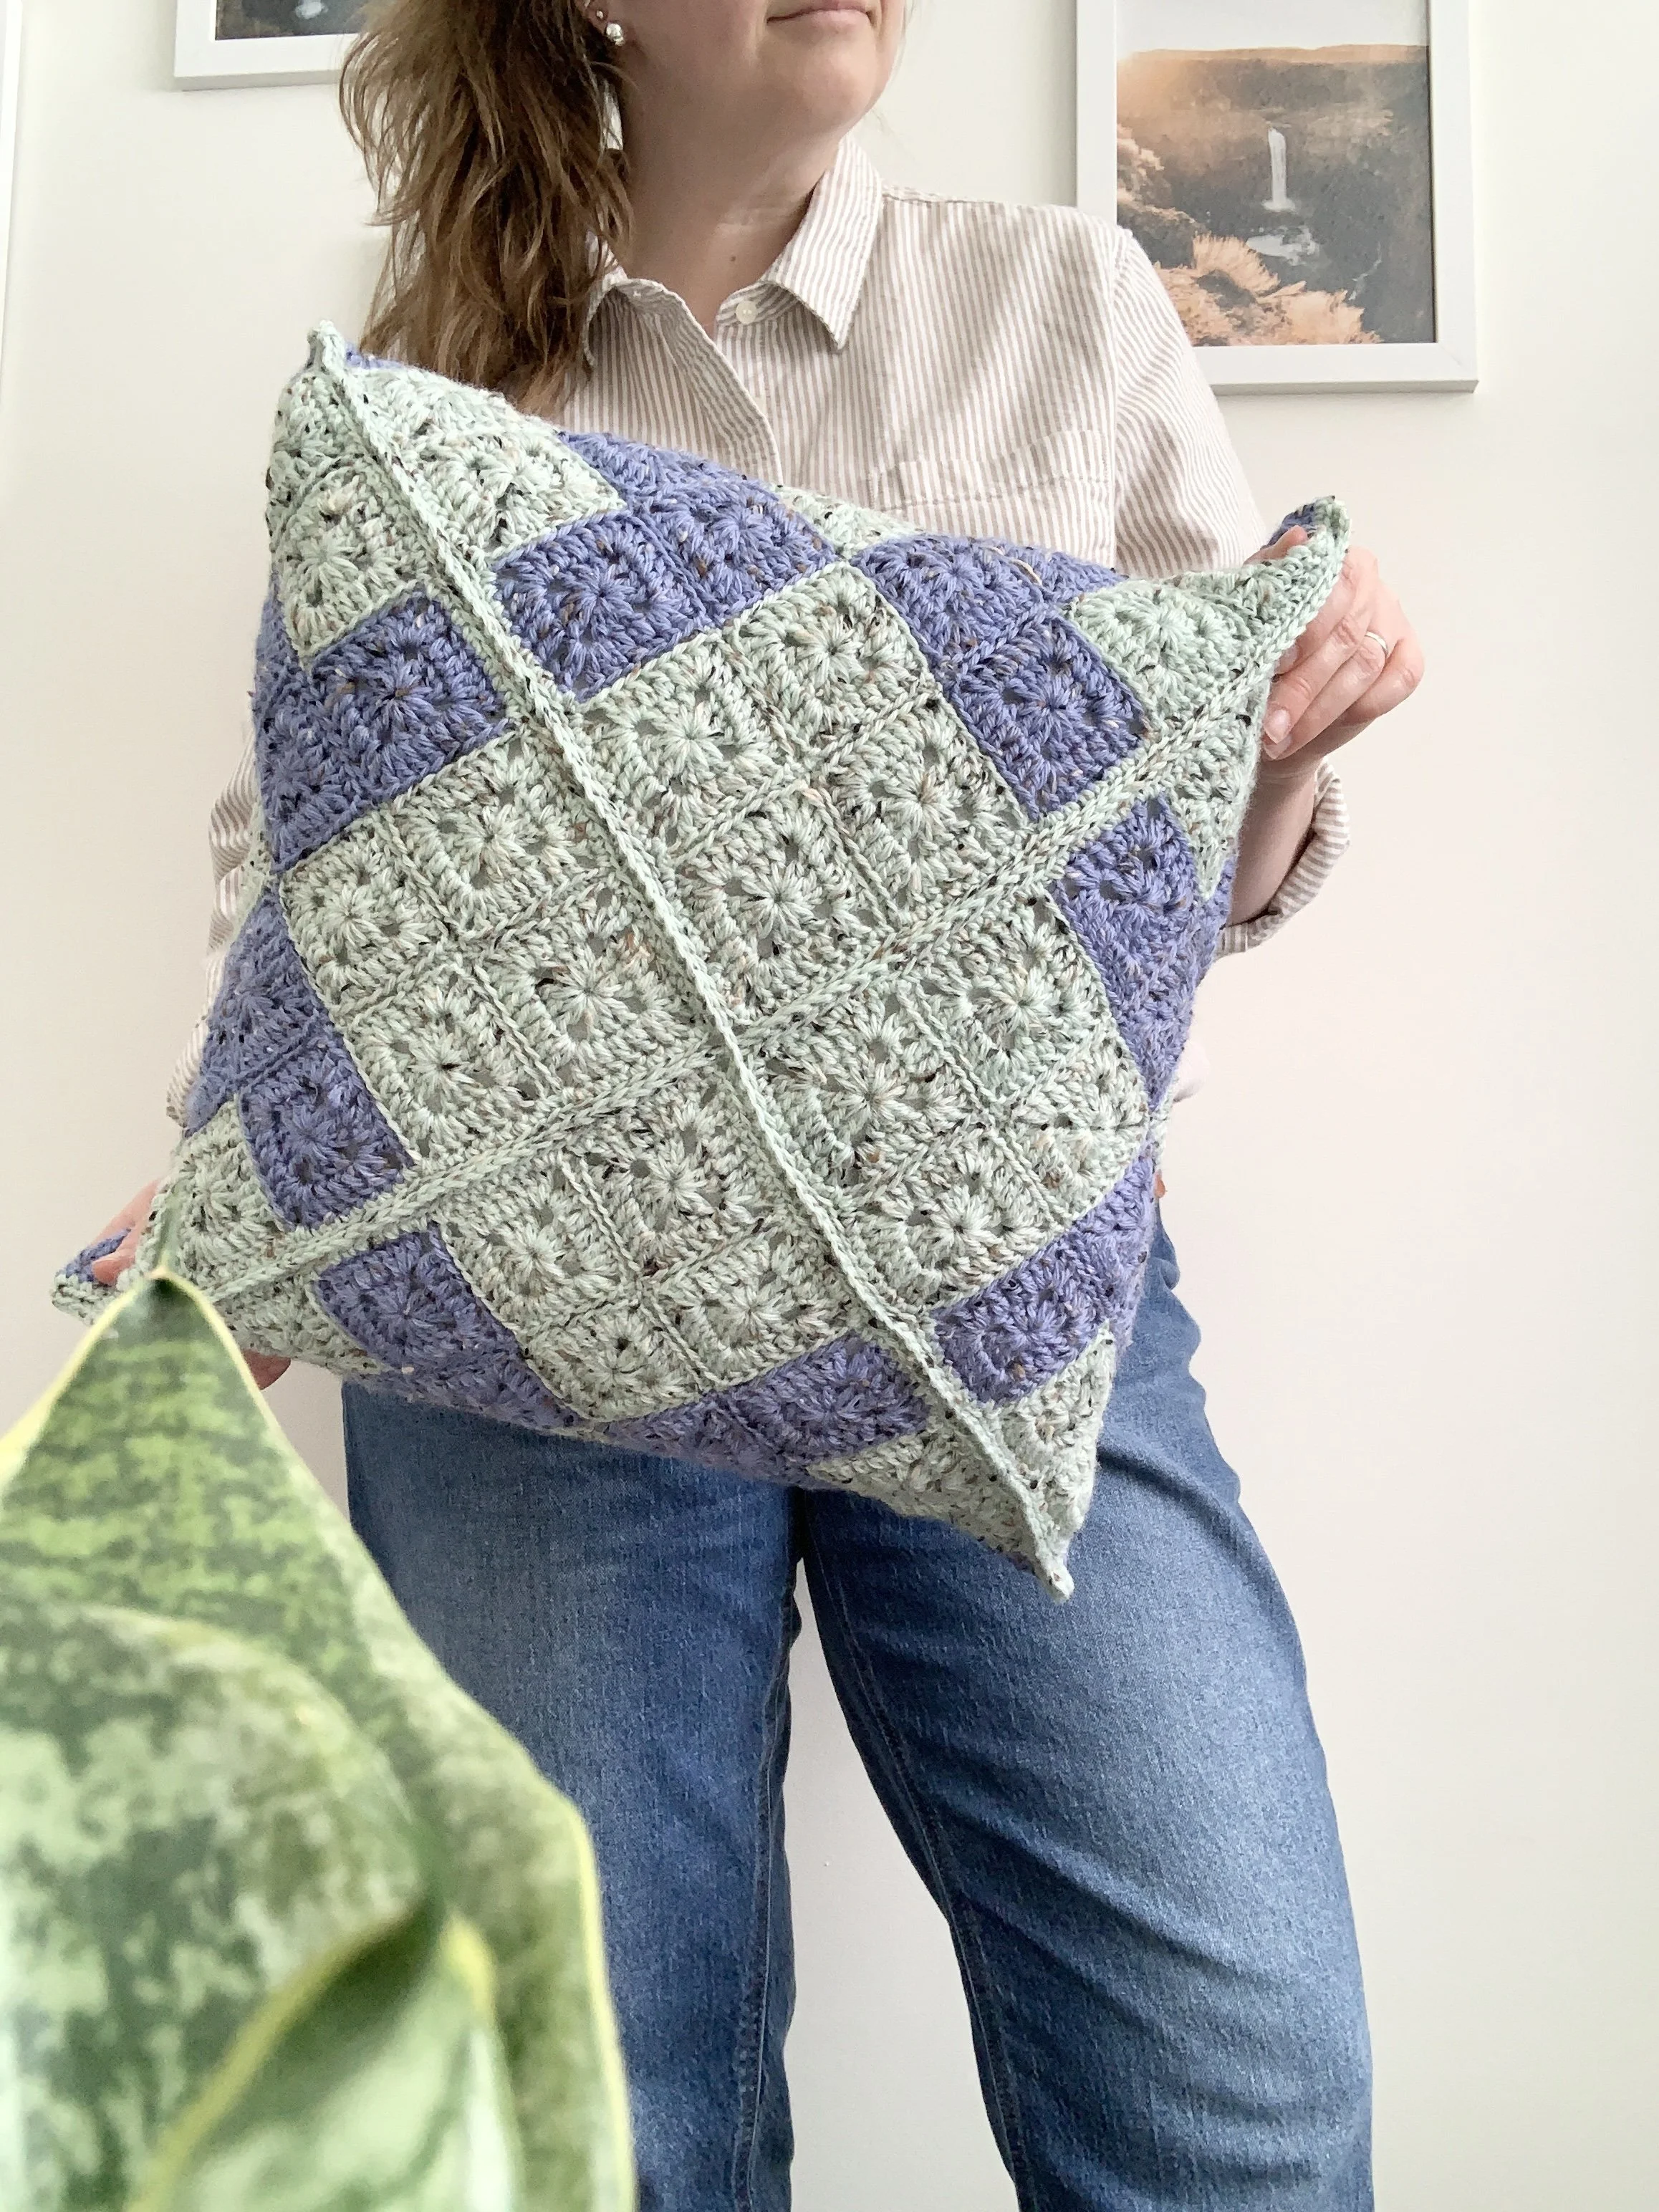
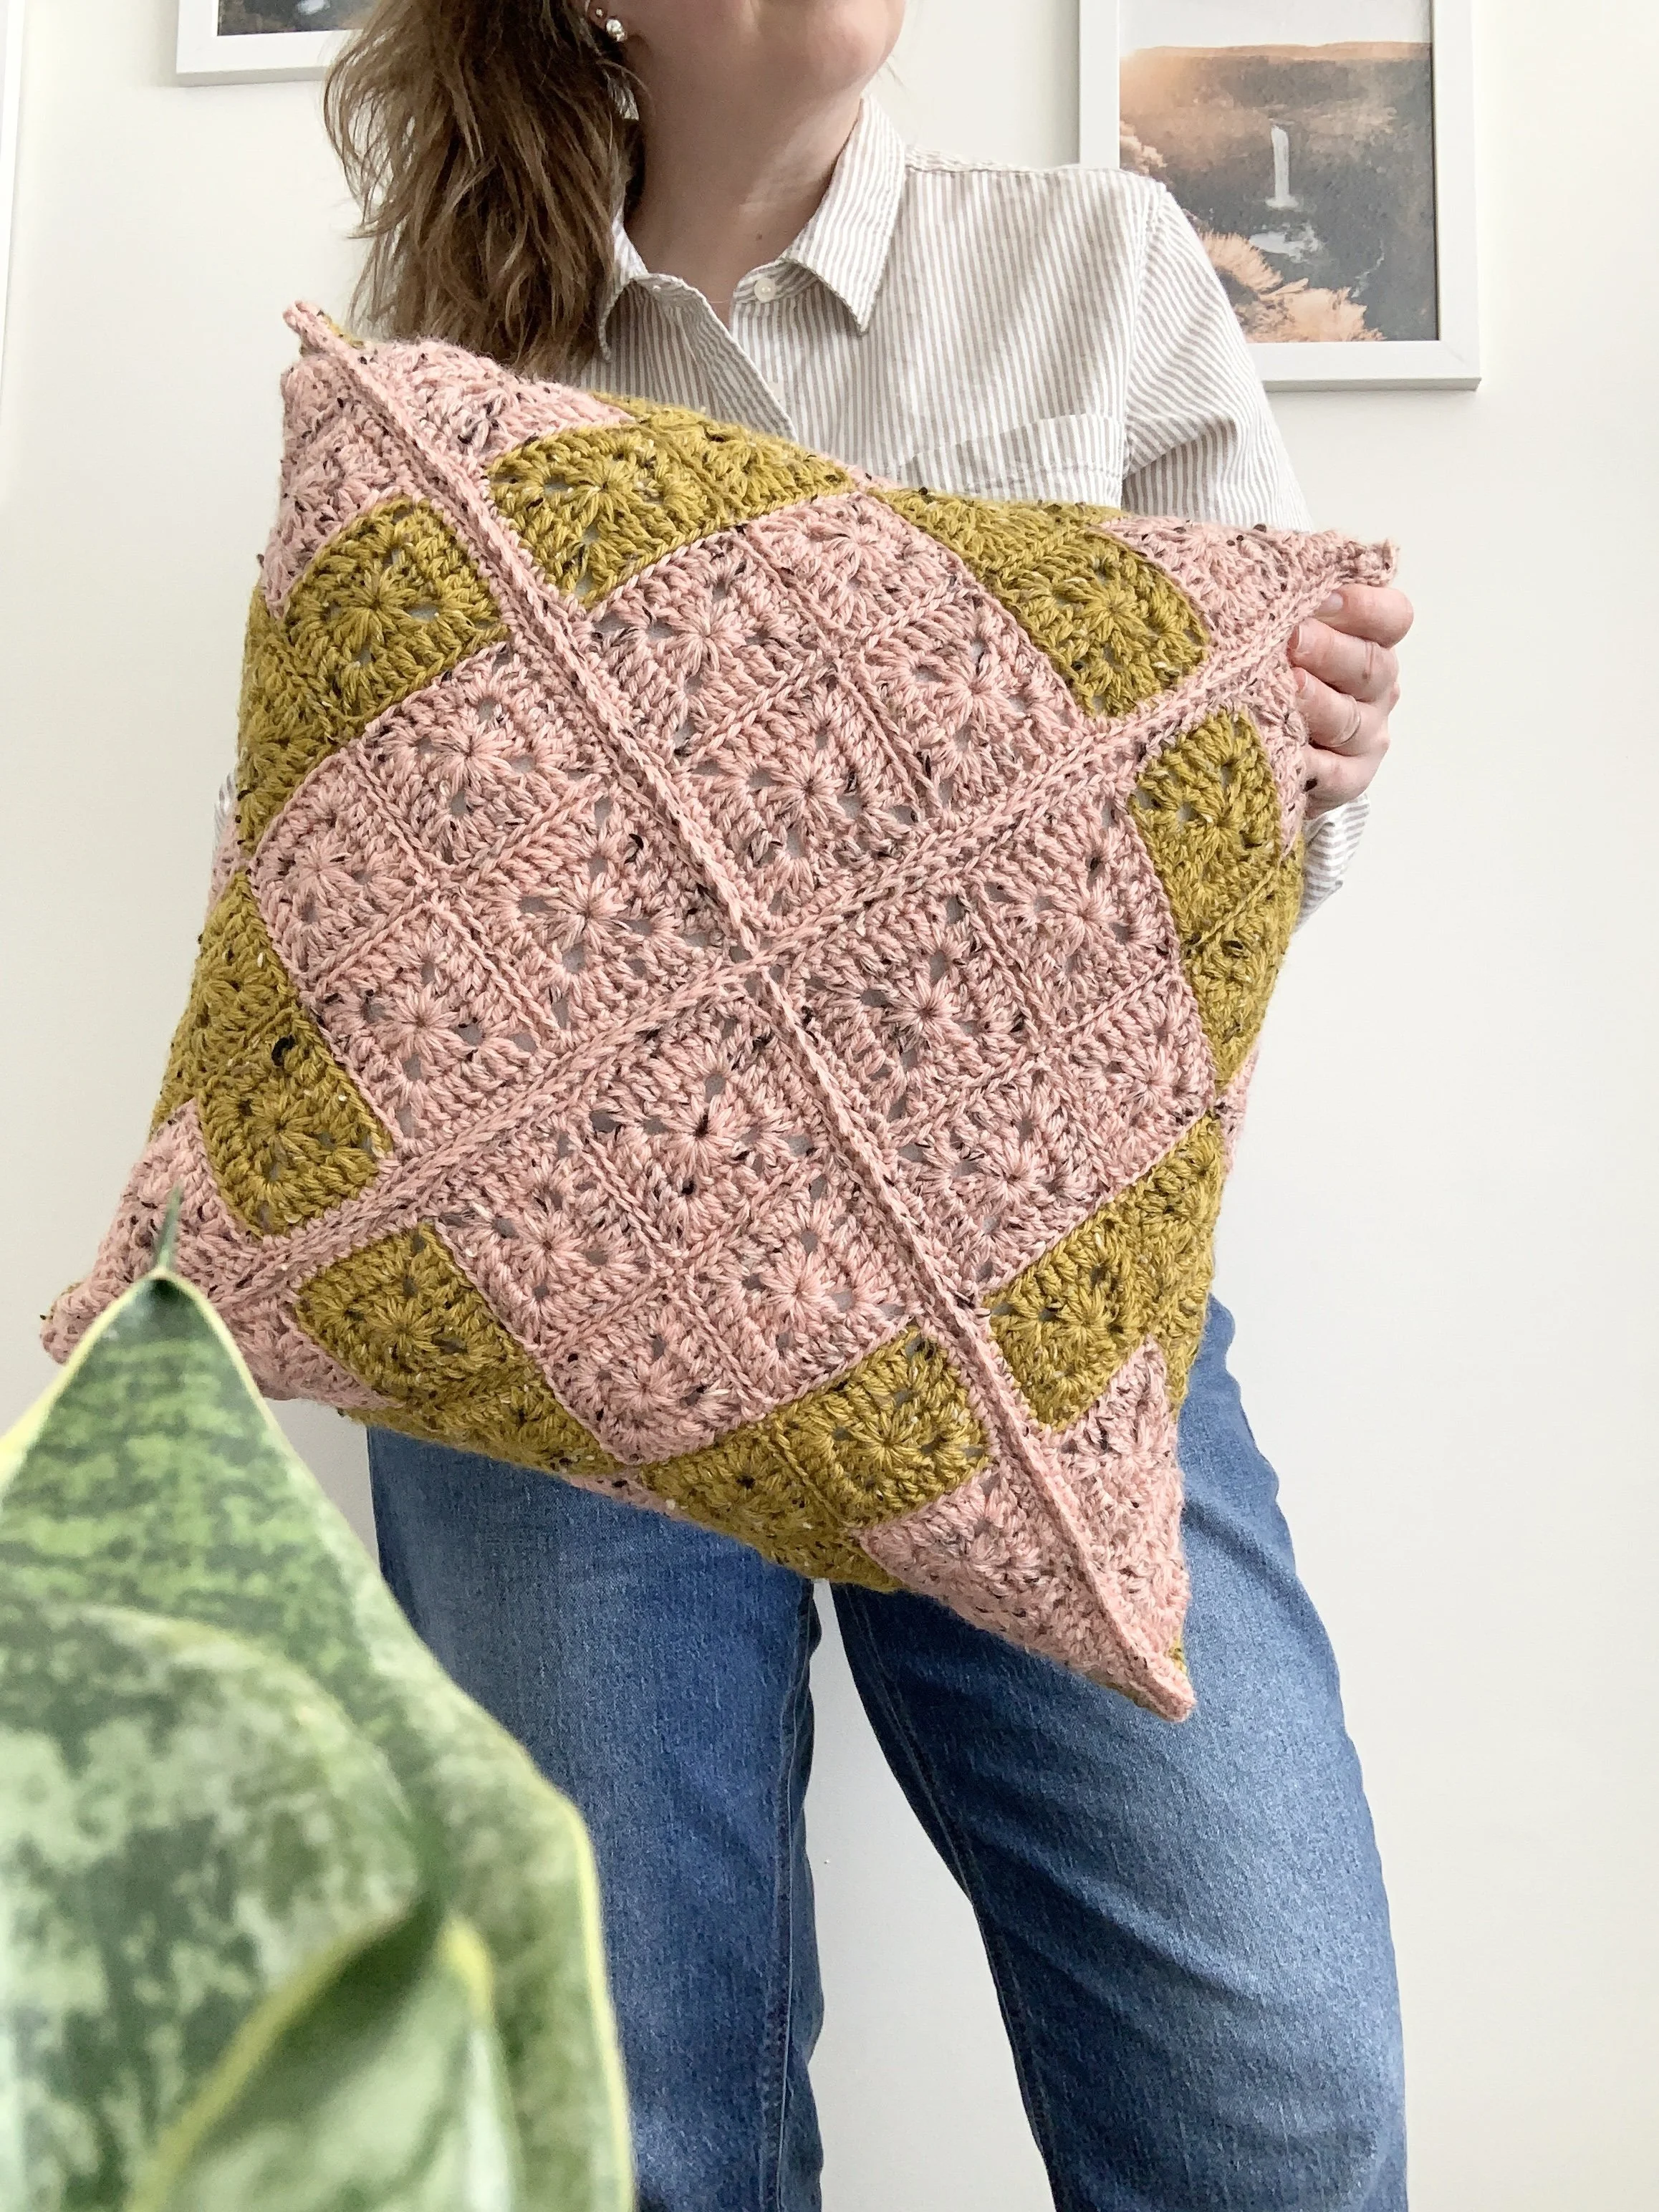
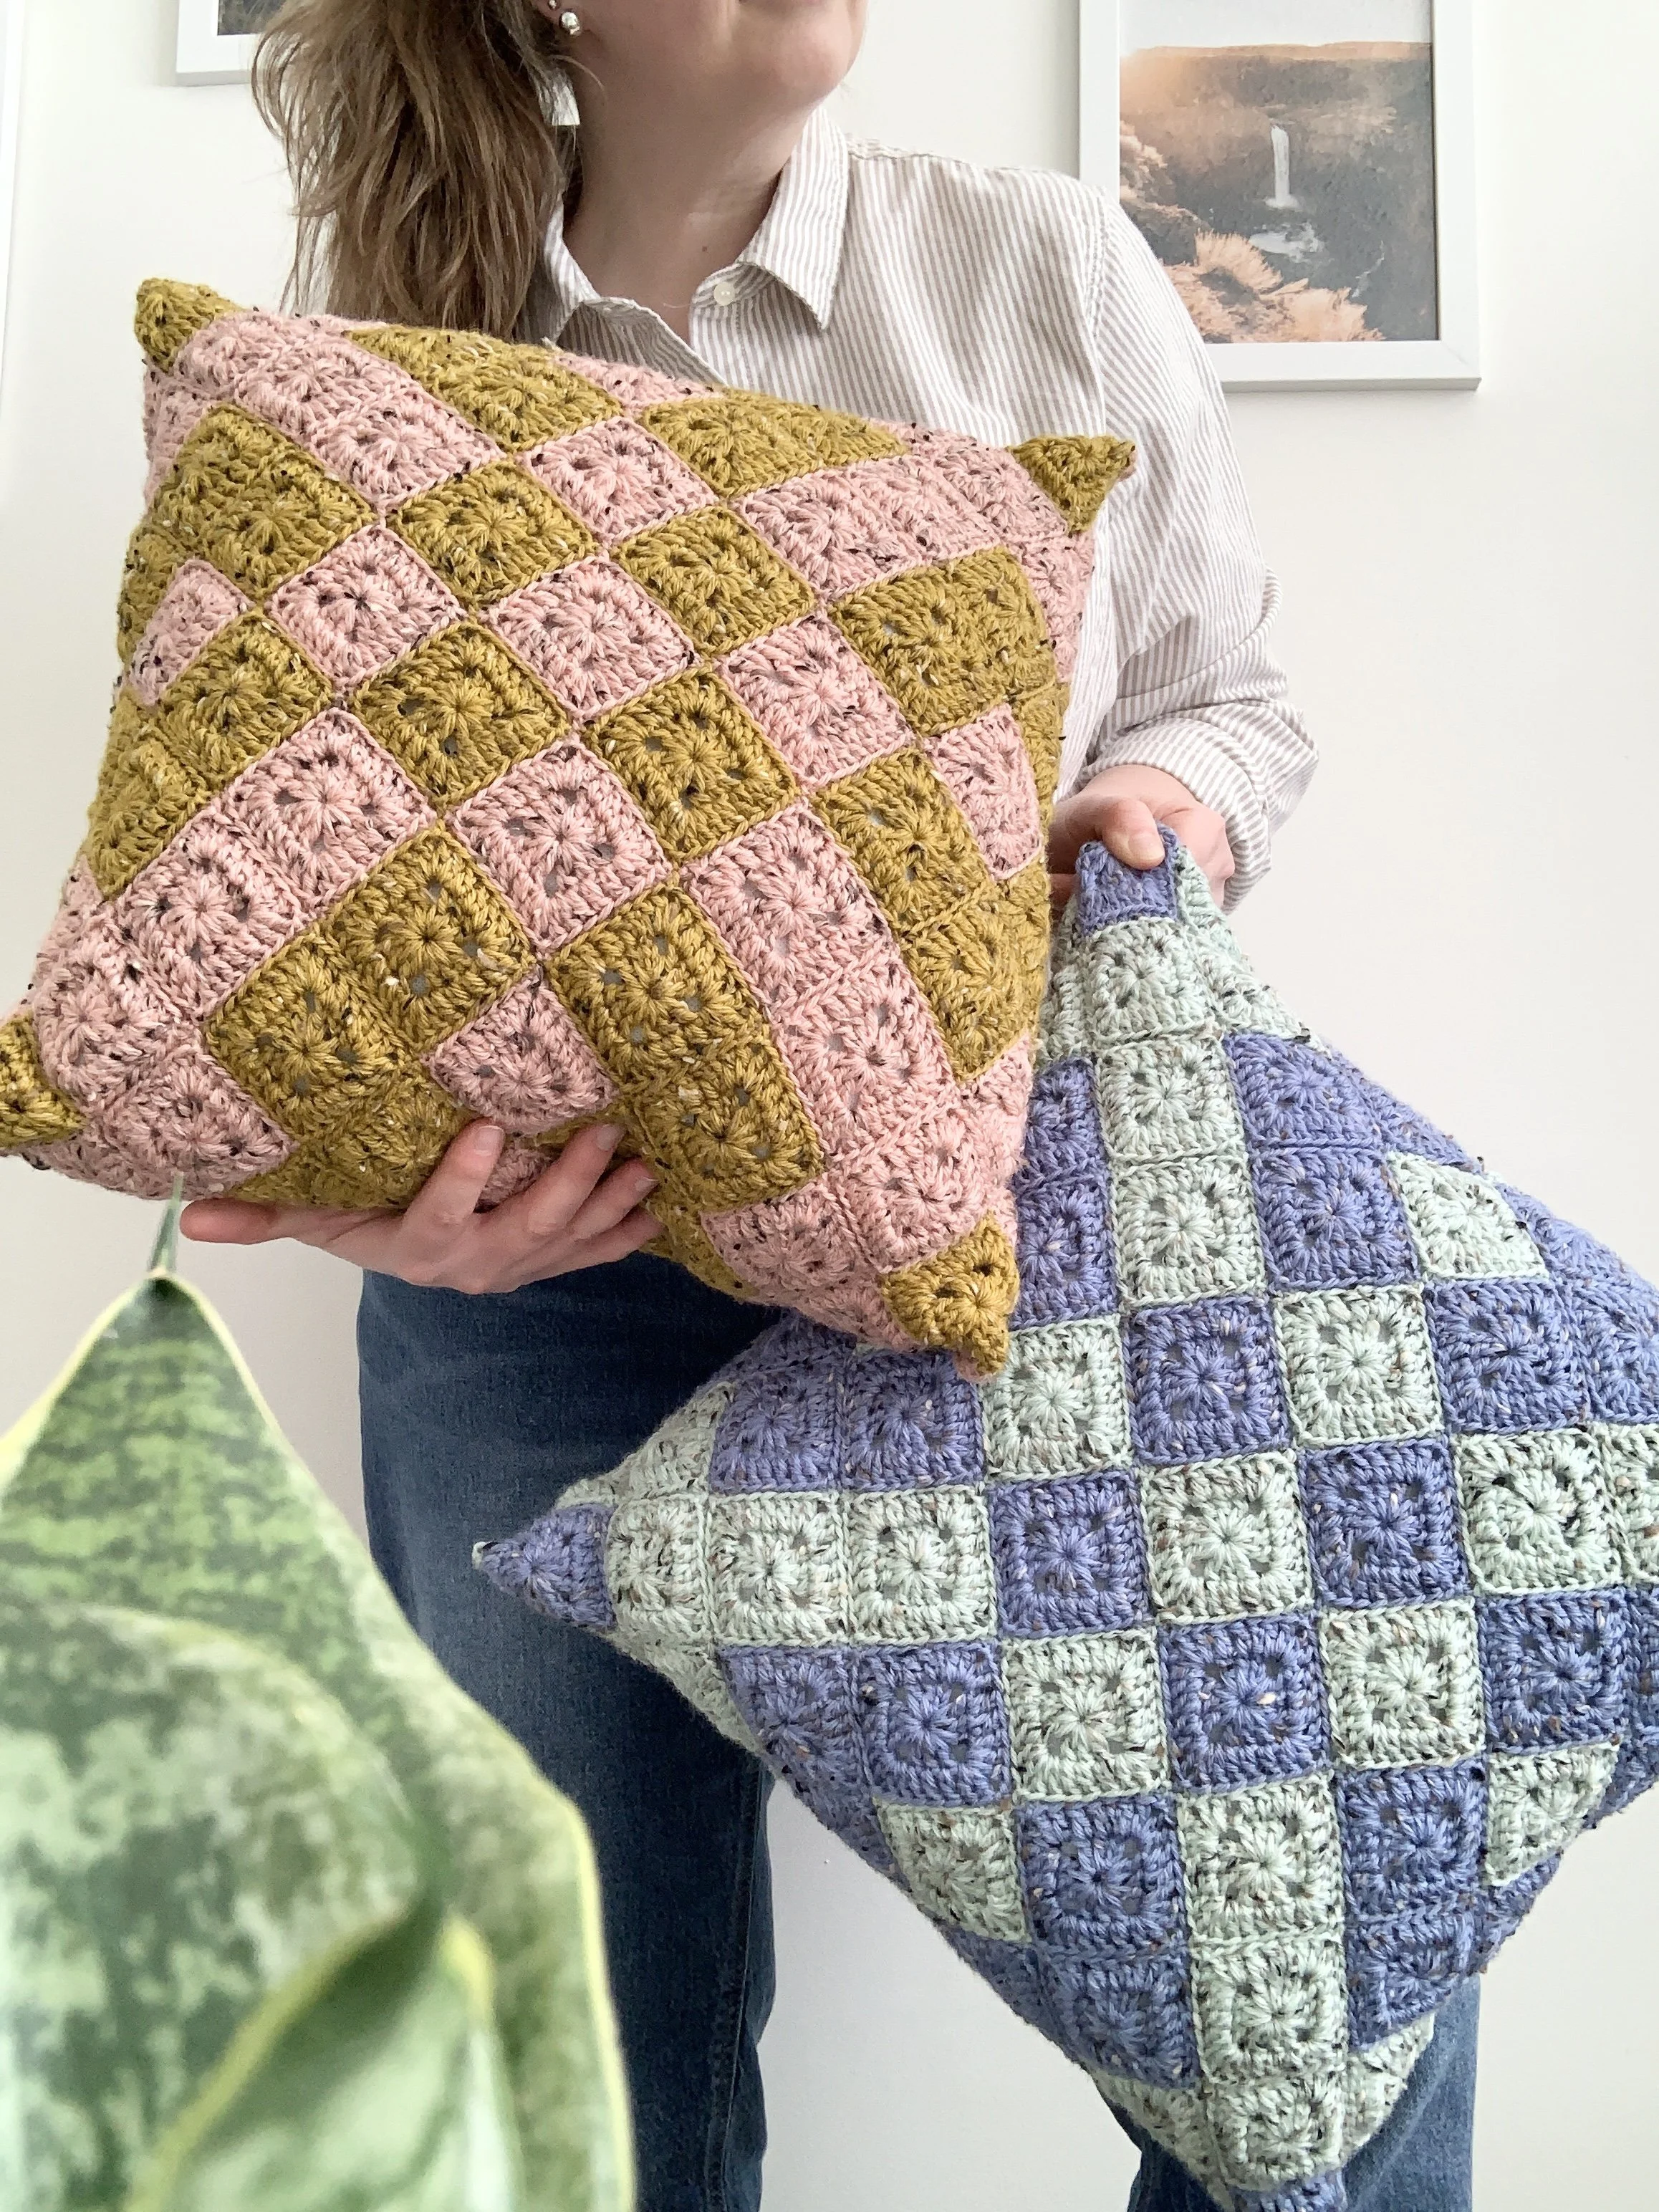
The Scandi Pillow Pattern combines my love of all things quilt inspired, Nordic stars and crocheted granny squares. By using baby granny squares, I’ve laid out a Nordic star which wraps around the pillow to cover it. This creates an off-center geometric design that I’m loving. Using a Colour A and Colour B layout-you can customise your pillows in an endless combination of colours. Happy squish-making!!
L, M
ps. If you want the ad-free, printable PDF of the pattern you can grab one in my Ravelry or Etsy Pattern Shops:

Notions
US 5.00 mm (size H) crochet hook
Needle for weaving in ends
Scissors
Washable Pillow Form in size 18”x18”
Yarn
Pillow 1:
WeCrochet Limited Edition Wool of the Andes Tweed (110 yds/50g):
Colour A: Opal Blue (427yds/194g) 4 skeins
Colour B: Thistle (286yds/130g) 3 skeins
Pillow 2:
WeCrochet Limited Edition Wool of the Andes Tweed (110 yds/50g):
Colour A: Coral Pink (433yds/197g) 4 skeins
Colour B: Golden Palm (293yds/133g) 3 skeins
Yarn Recommendations
Limited Edition Wool of the Andes Tweed by WeCrochet (80% Peruvian Highland Wool, 20% Donegal Tweed)
Hue Loco Semisolids & Speckled Worsted (100% SW Merino)
Heatherly Worsted by WeCrochet (80% Acrylic, 20% Merino Wool)
Brava Worsted by WeCrochet (100% Premium Acrylic)
Shine Worsted by WeCrochet (60% Pima Cotton, 40% Modal)
Swish Worsted by WeCrochet (100% Fine Superwash Merino Wool)
Gauge (Worsted Weight)
2 rnd square= 2.25” across (unblocked)
Finished Size
18” x 18”
Glossary (using US Crochet Terminology)
st(s)- stitch(es)
ch- chain
ch-sp- chain space
sl st- slip stitch
YO- yarn over
SC- single crochet
DC- double crochet
RS- right side
WS- wrong side
BLO- back loop only

Pattern Notes
In some cases, the video tutorials have been used for other patterns. Please follow the yarn recommendations, hook size and stitch counts in the written pattern- the videos are only meant as visual guides.
Gauge will affect yarn quantities, please adjust hook size to meet gauge.
Ch 2 counts as DC throughout.
Final pillow panel should measure 24-25” wide to fit snug around the pillow insert without being saggy.
Don’t forget to share your makes on Instagram and Facebook! I always love seeing what you have all worked up. Tag me on Instagram @nautikrallcrochet or Facebook @nautikrall_crochet, or use the hashtag: #scandipillowpattern
Schematic


Pattern Solid Granny Square:
Round 1
Ch 4, sl st into 4th ch to form ring.
Ch 2, 2 DC into centre ring, ch 2.
[3 DC into centre ring, ch 2], three times.
Join rnd with sl st into top of first DC (not the ch-2).
Do not fasten off.
Round 2
Ch 2, DC into same st.
*DC into each st across, [2 DC, ch 2, 2 DC] into corner sp.*
Repeat from * to * three times.
DC into each remaining st of rnd, join with sl st into the top of the first DC (not the ch-2).
Fasten off.
***Please see the YouTube video tutorial below on how to make the Solid Granny Square (Note: the following tutorial is for a 4 round solid square; the pillow only uses a 2-round square but the method is the exact same):


Assembling Pillow Panel
With RS up, follow the colour layout in the schematic above to create your Scandi Pillow Panel
Once squares are placed in preferred arrangement; using Colour A, follow along with the video tutorial below to sl st the squares together in BLO.
Fasten off and weave in all ends before starting Border rnd.
**Please see the YouTube video tutorial below for how to join squares with slip stitches in BLO to make the pillow:

Assembling Finished Pillow Cover:
Place pillow panel flat with WS up.
Fold corners of pillow panel towards the centre; seam together using SC in BLO.
On the final seam, remember to leave enough room (about 5-6”) to stuff your pillow into the cover before seaming shut.
Fasten off, weave in all ends.
***Please see the YouTube video tutorial below on how seam the Pillow Panel together:
~The End~
The pattern, the photographs and video tutorials in this document are the property of NautiKrall Crochet. You may sell items you make from this pattern; but may not sell, reproduce, or distribute this pattern, in whole or in part, as your own.
Copyright © 2025 NautiKrall Crochet – All rights reserved.
